Aug 17,2023 ·
1 min read
Page last updated 3 days ago
Getting Started Using Starknet: Setting Up a Starknet Wallet
A gentle hand-holding guide for your first steps using Starknet
Share this post:
Background
When I tried to get started using Starknet, I found it difficult to know exactly what to do. While I’ve heard a lot about the wonders of Starknet and how it can save me money in fees while providing security and trustlessness, I’m a blockchain newbie. In my quest to onboard to Starknet and try out some of the applications in the ecosystem, I found a lot of helpful information, but I also didn’t find a lot of information.
So this post provides the information that I couldn’t find and provides links to information that someone else made the effort to provide elsewhere.
What can you do on Starknet? You can swap tokens, invest using financial dApps, play games and build your NFT collection. For more information, visit the dApps page on Starknet.io.
About using MetaMask as a Starknet wallet
MetaMask has support for Starknet in the form of a MetaMask Snap. A Snap is the MetaMask term for a plugin. It’s in Beta, and I wanted to try it out. There’s a special section below just about installing and funding a MetaMask wallet.
Currently you can only send and receive L2 funds (it’s only in Beta!), but other features are in the pipeline, so I’m looking forward to being able to use MetaMask as a full-fledged Starknet wallet for more Starknet activities, such as minting NFTs.
Prerequisites
Although this is a guide for newbies, you will gain more out of using Starknet and this tutorial, if you understand Ethereum basics. You should understand the terms Layer 1 (L1) and Layer 2 (L2), and on-chain and off-chain, and what they mean in the context of Ethereum.
You should also understand what wallets are, the difference between hot and cold wallets, EOAs and contract accounts. You can find this information on the Ethereum website.
High-Level Steps
Each of these steps is detailed either in other sections of this blog post, or in external documentation on another site.
- Set up an Ethereum wallet.
There are many. For a list, see Ethereum wallets, and for a helpful guide, see How to "create" an Ethereum account. Both are on the Ethereum site. You can use a search engine like Google to help you decide on the right one for you. I found that Best Ethereum Wallets of 2023 helped me, and to get started, I decided to use MetaMask. For information on setting up a wallet, see the documentation for the wallet you choose. - Deposit some ETH to your Ethereum wallet. You can use your credit card or your bank account with an exchange such as Binance or Coinbase.
- Set up a Starknet wallet, which includes funding the wallet and deploying your account on Starknet. For more information, see Setting up a Starknet wallet below.
NOTE: You can also add funds directly to your Starknet wallet from a credit card or bank by using an on-ramp service, such as Banxa or Ramp. At the moment, Ramp is the only such service that works with the MetaMask Starknet Snap. If you choose to use an on-ramp service, go directly to step 3
After you complete these procedures, you’ll be ready to start actually doing something.
For example, this tutorial walks you through swapping ETH for another cryptocurrency using Jediswap. There are lots of other things you can do, such as providing liquidity to a pool, buying NFTs, minting your own NFTs, and playing games.
Let’s Get Started - Setting Up a Starknet Wallet
For information on using MetaMask, skip to Using MetaMask as a Starknet wallet below.
Once you have an Ethereum wallet with some ETH, you can install and set up a Starknet wallet.
See the up-to-date list of available Starknet wallets on the Starknet site. For more information on a specific wallet, including installation instructions, see that wallet’s site. Whichever one you choose, make sure that you install it as a browser extension.
In this blog post, I used wallets by Braavos and Argent.
After you finish installing, you need to set up the wallet by adding funds to it. You can use StarkGate, a bridge that transfers funds between your Ethereum wallet on L1 and your Starknet wallet on L2. StarkGate fully supports Braavos and Argent, and MetaMask support is in active development and should be in place soon. You can go to StarkGate from a link in the wallet, or go to https://starkgate.starknet.io/.
Procedure
- Click Connect Wallets, and then Get Started.
StarkGate prompts you to select an Ethereum wallet.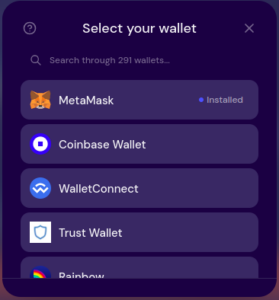
- Click the wallet that you want to use. In this example, click MetaMask, as it is already installed.
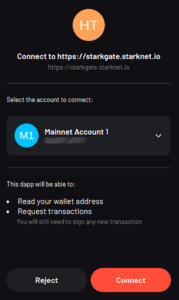
- When your wallet prompts you to connect, approve the connection.
StarkGate completes the connection. Your Ethereum wallet is now connected. - StarkGate prompts you to connect a Starknet wallet, showing the wallets that you have connected to your browser. Click the wallet that you want to use.
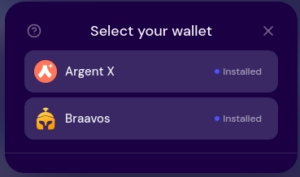
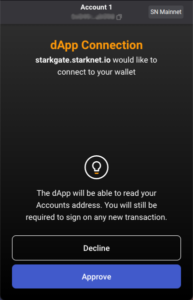
- When the wallet prompts you to approve the connection. For example, this is what appeared when I clicked ArgentX:
and this is what appeared when I clicked Braavos:
StarkGate completes the connection.
Your Starknet wallet is now connected, and it prompts you to add funds. In order to deploy your account on Starknet, you need to add funds.
NOTE: Deploying an account incurs a small gas fee on Ethereum. But don’t worry, you only have to deploy the account once.
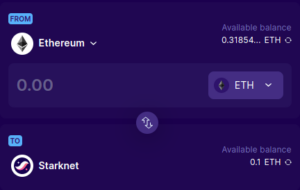
- Confirm that you’re on the Deposit tab.

- StarkGate lets you select from several different types of tokens. This example uses the default token, ETH. Check that the available balance in your Ethereum wallet is enough to transfer funds and pay for the gas required to transfer the funds.
- Enter the amount of ETH you want to transfer.
Your Ethereum wallet prompts you to confirm the transfer. Your wallet might also show you the estimated transaction cost. For example, MetaMask shows approximately how much gas is required to execute the transfer, as well as the cost of the required gas in ETH and USD. - Confirm the transfer in your Ethereum wallet.
- StarkGate confirms the transaction and displays its status, including links to Etherscan and StarkScan, so you can view the transaction on both Ethereum and Starknet:
![]()
After a short time, typically a few minutes, StarkGate should show updated balances in your Ethereum and Starknet wallets:
Swapping ETH for another token using JediSwap
JediSwap is a community-driven Automated Market Maker (AMM) on Starknet that enables you to swap one type of token for another. The JediSwap documentation provides information on swapping and on adding liquidity. This procedure demonstrates swapping ETH for WBTC.
Procedure
- Go to JediSwap at https://app.jediswap.xyz.
- Connect your wallet by clicking Connect Wallet and then selecting your Starknet wallet.

- When your wallet prompts you to approve the connection, click Approve.
Once JediSwap connects to your wallet, it shows your balance in each token that it supports. For example, my wallet has about 0.05 ETH.
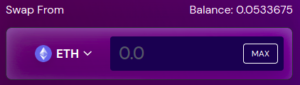
- Select the tokens that you want to swap in Swap From and Swap To (est.), and click Swap. I swapped 0.025 ETH for WBTC.
- Your wallet prompts you to sign the transaction by clicking Sign. Clicking Sign submits the transaction
- JediSwap shows Transaction Submitted. Click Open in browser to view the transaction on StarkScan.
- Open your wallet to see your balance and the assets that you own. For example, this is my Braavos wallet after the swap:
Using MetaMask as a Starknet wallet
I wrote this section as I walked through the installation process. It’s actually fairly straightforward, so you might not even need to use these steps, but I know that I find steps like these to be helpful, so you can follow along if you like.
NOTE: Because the Snap is being actively developed, the process you go through might differ from what appears here. But even if it does, this section should give you a general idea of what you need to do.
When I opened MetaMask in my browser, this is what I saw:
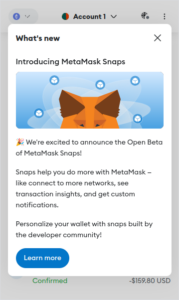
I clicked Learn More, and a page opened at https://metamask.io/snaps/ that explains what Snaps are and how they work. Here are the steps I followed to install the Starknet Snap:
-
Click Discover Snaps in the site header.
-
Click the Starknet Snap in the list.
A page opens with information about the Starknet Snap, including its Github repo. I’m a big fan of open source, so…Yay! The information also includes the developer, Consensys, and the auditors, Cobalt and Consensys Diligence. These are all well-respected Starknet developers, but you should verify that for yourself. (I do work for StarkWare, after all.) -
Click Add to MetaMask, and read the Third-party software notice.
-
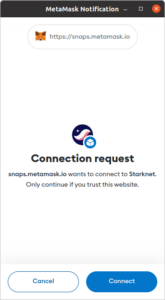
Click Accept. A message prompts you to connect the Snap to your wallet.
-
Click Connect.
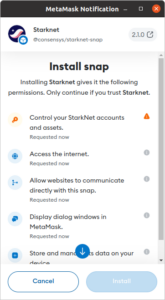
-
After reading everything on this page, click Install.
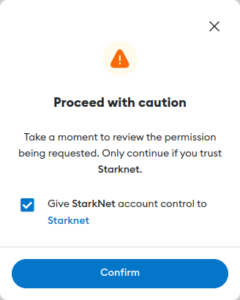
-
Click Confirm to proceed with caution.
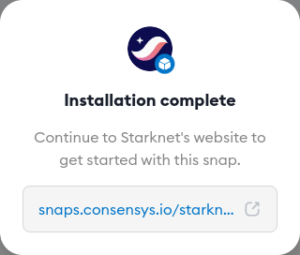
 After the installation finishes, this message appears: Installation completed successfully.
 -
Click the URL to open the Snap.
 A message prompts you to connect your wallet.
 -
Click Connect. A screen appears showing your new Starknet account address and your wallet balance.
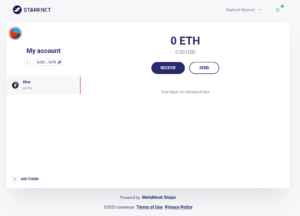
Now you need to fund your wallet. StarkGate should have support soon, but at the moment, to fund your wallet, you must receive L2 funds from another Starknet wallet or use the onramp service Ramp with a credit card, to fund it.
Once you have funds in your wallet, you can send funds to another Starknet address. Like I said, more features are coming soon.
Using STRK Tokens with MetaMask’s Starknet Snap
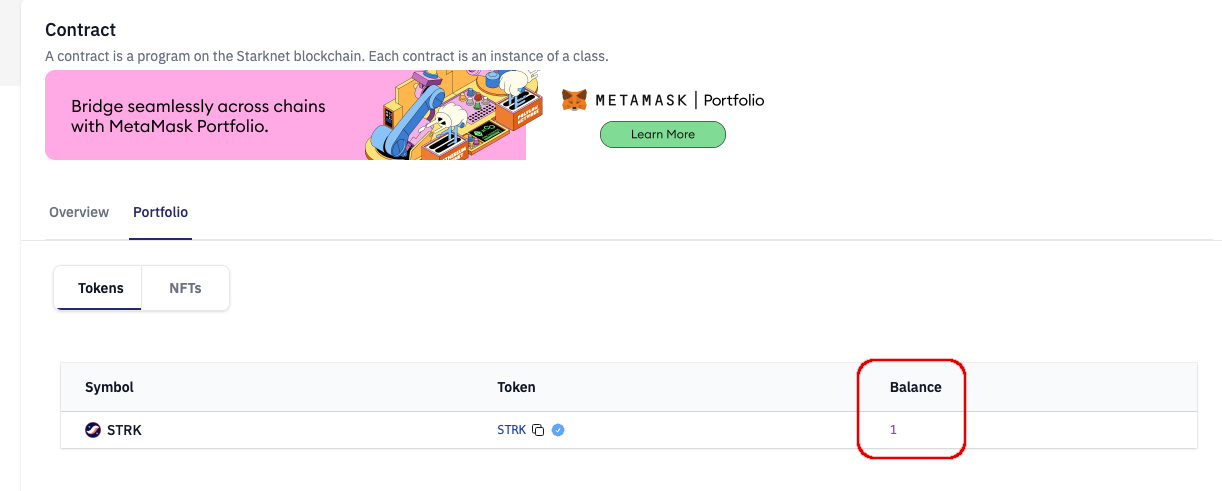
To check if your (potentially undeployed) MM Snaps wallet has STRK tokens:
-
Go to https://starkscan.co/contract/<wallet address>, where <wallet address> is your wallet’s address, and click Portfolio. You should see the wallet’s balances.
-
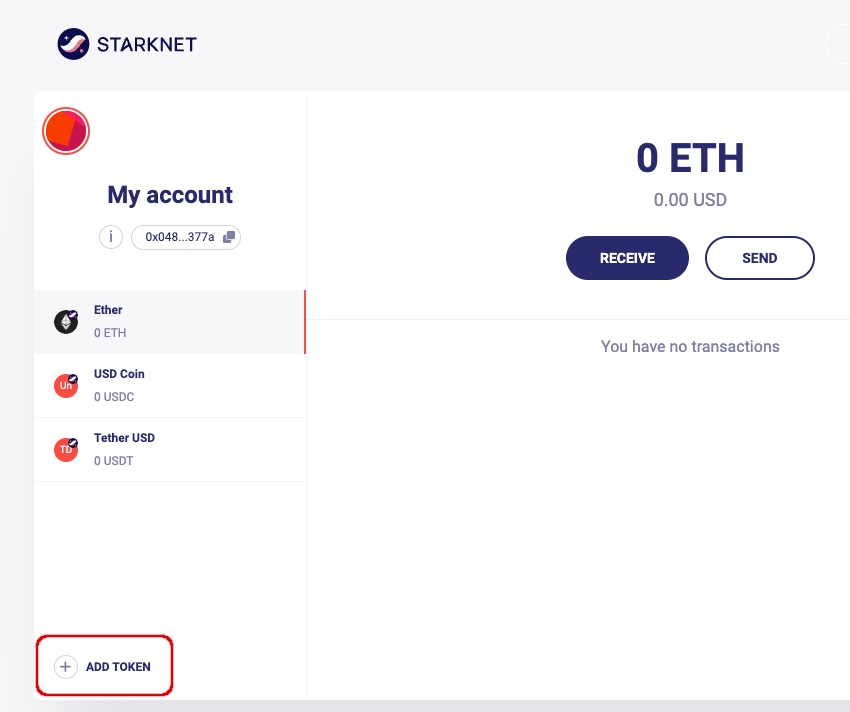
Open MetaMask and open Snaps: Click the three vertical dots to open the menu, and then Snaps > Starknet. Then click the URL https://snaps.consensys.io/starknet. The Starknet snap opens.
-
Click (+) ADD TOKEN, and the Add Token screen opens.
-
Fill in the following details:
ContractAddress:0x04718f5a0fc34cc1af16a1cdee98ffb20c31f5cd61d6ab07201858f4287c938d
Name:Starknet Token
Symbol:STRK
Decimal:18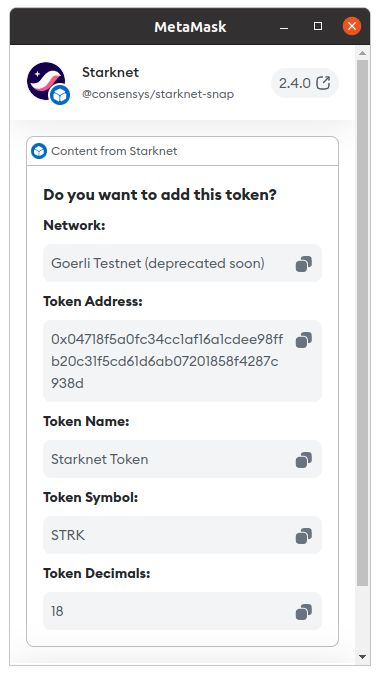
-
Approve the request in MetaMask.
-
You should now see the Starknet token STRK in the list of tokens in the Snap.
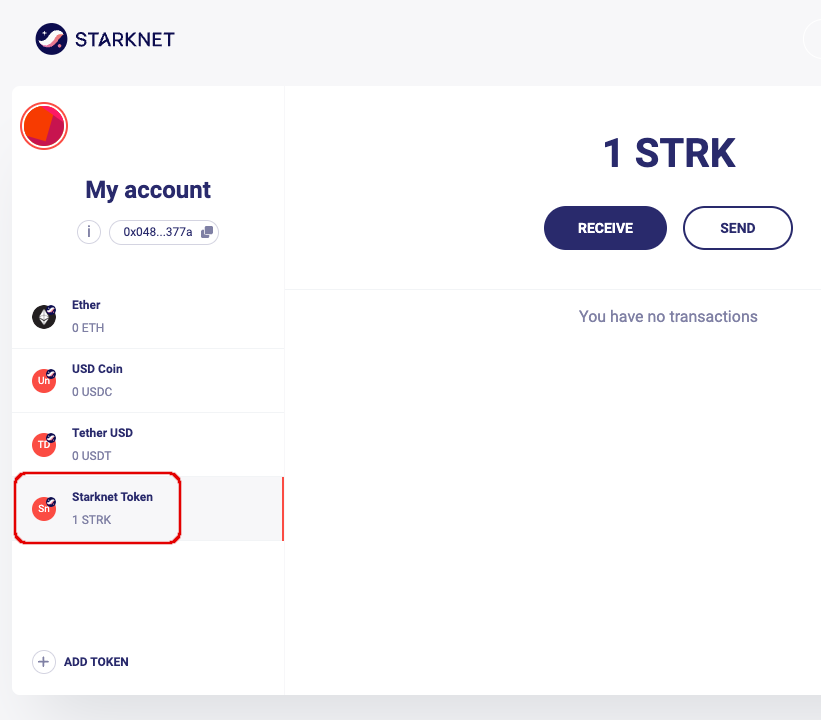
-
Currently, you can pay fees in STRK with the MetaMask Snap. You need to first transfer a small amount of ETH to the Snap’s wallet to pay for deploying the account and sending the STRK. You can send ETH to the wallet even before you have deployed it.
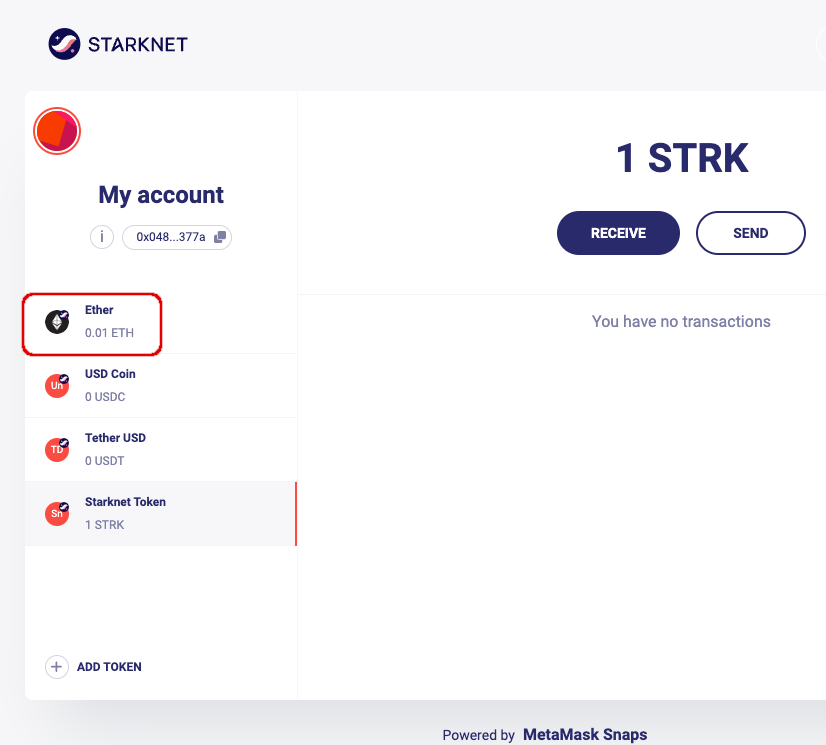
-
Once you have some ETH, you can send the STRK from the account.
NOTE: There might be a bug in Snaps where after transferring ETH to the account, the balance of the STRK tokens appears 0 instead of the actual amount. In this case, redo the steps to add the STRK token as described above.
What now?
Now that you've taken those first steps into Starknet, it's time to plunge deeper into the ever-expanding Starknet ecosystem. As a permissionless network, Starknet sees new developers constantly creating novel dApps and features
To safely navigate the uncharted waters of Starknet, make sure to:
- Research new releases. Regularly scan Starknet's news sites and follow the core community to stay abreast of new dApps. This universe evolves fast.
- Research before interacting with any dApp on Starknet. As with all permissionless platforms, perform due diligence on the legitimacy and security of any dApp before connecting your wallet.
- Seek fellow travelers. The Starknet forum at https://forum.starknet.io/ is ideal for learning from the journeys of pioneers. Ask questions, think critically.
- Be wary of scams. Verify URLs, transactions, and addresses - don't be lured into ambushes.
- And most importantly, enable wallet protections like 2FA, Hardware Signers, or Wallet Shields. This novel protection level is possible on Starknet because of native account abstraction.
By staying alert and doing thorough research, you can enjoy the full benefits of Starknet's ever-growing array of dApps and integrations. As with any new technology, educated caution is very important. If something sounds too good to be true, it probably is. With some common sense, you can explore Starknet safely.
_________________________________________________________________________
This guide was written by Steve Goodman, Principal Technical Writer at StarkWare Industries. You can send questions to @CityOfNewOrleans on Twitter.